The Milky Way always fascinates me! Here is a video tutorial I made using Adobe Lightroom to edit and enhance your star and Milky Way Photography and take it to the next level!
0:00 My name is Juventa Vezzani with Vezzani Photography and today I just wanted to take you through editing your photograph so that you can get a picture like this with the Milky Way when taking pictures of the night sky. And so I just wanted to show you what I did to get this photograph.
0:23 So first I want to start by showing you what my original photograph looked like. As you can see, obviously it was dark. This was taken at Glacier Point in Yosemite National Park and you can see the Milky Way here, but it doesn’t really stand out the way I would like it to. You can kind of see in this preview here some of the grain that was involved in that photograph.
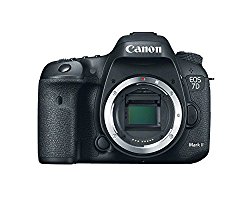
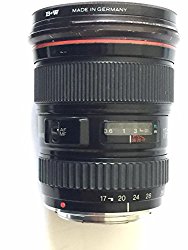
0:48 This picture was taken with a Canon 5D Mark ii and I used my wide angle Canon Lens for this. It was taken at ISO 2500. I had it at 24 mm and then it was taken at f/2.8 and it was exposed for 20 seconds. I have a remote control shutter release button and I was able to use that to do my exposure so that I didn’t have camera shake by pushing the button. That helps a lot in getting sharpness for your photographs.
1:23 So the first thing I wanted to do was to change the temperature of this photograph. It will just take a second. So as you can see if you look to the right of this screen, I wanted to customize the white balance. And so I took the temperature, now this will vary depending upon your conditions, but you want to get it in the 3,000s so it looks more blue and looks more magical that way. So I took it to 3194 for the temperature and it put it at +3 for the tint.
1:58 I also increased the exposure by .35. I increased the contrast to +100. I really wanted to get some silhouetting and some colors in here. And then I decreased the whites by negative 38. I did that so that you could really see and narrow in your focus on the stars. I also increased the clarity +21, the vibrance +15 and the saturation +5.
2:27 Because it made the photograph so dark increasing the contrast, I played around with the exposure until I was happy with it. I ended up with a +1.5 exposure for this photograph. Then I took my picture using the crop feature, which is located over here, and I cropped it so that you really didn’t see a lot of the black but your focus is on the Milky Way. Now this was taken in August of 2014 and the reason why I went up in August is because even though you can see the Milky Way in all times of the year, the late summer months are when you can see the bottom parts of the Milky Way and it is just spectacular. If you look you can see these cloud formations and the colors.
3:17 Otherwise, you would just see this section of the Milky Way, and while it’s still beautiful, you’re missing out on this beautiful section of the Milky Way. So if you have a chance to go late July/early August, and if you have a clear night, it’s really worth the effort to do. You also want to go on a night when it’s a new moon. That way you won’t have any extra ambience from the moon light. That’s a mistake I made when I went up and realized, “Oh, it’s a full moon.” And so I couldn’t get my Milky Way shots. So make sure you look at a lunar calendar and go right around a new moon and you should be fine.
3:55 One thing to note with ISO being at 6400, if you look over here, it is pretty grainy. And so, I decided to smooth it out a little bit and make my luminance at +59. I wouldn’t go any higher than that. That’s just about right to go at +59. So just keep that in mind. You’re still going to have a little bit of grain, but it’s really not bad when it prints on the overall picture.
4:26 After that, I decided to do some brush strokes and I did that so that I could really enhance the Milky Way a little bit. So if you look over here in the right hand corner of Lightroom, there’s this little paintbrush. You want to click on that and I’m going to show you where I painted. So I started by painting this section and I just wanted to give it a little bit more clarity and bring out the colors that were already there. I didn’t change the hue of the colors, I just wanted to pull out what was already there. So I added +5 on clarity and +15 on saturation. And you can do that by typing in these boxes or clicking on these sliders and moving them to the left or right. And this is really a personal preference on what you want to do.
5:17 I went ahead and increased the brush stroke to more parts of the Milky Way. So you can see I brushed here and then I brushed here. And I ended up going up just a little bit all the way up to the top of the Milky Way as you can see. That’s kind of where I added it. I kept the saturation and clarity the same.
5:41 Then I wanted to bring a little bit more definition to my Milky Way and so I decided to increase the clarity to +17 and then I wanted to also increase the highlights a little bit to bring out some of the white in these cloud formations and so I just did +8. It just a tiny, tiny bit to bring out some of those cloud formations.
6:09 I then increased the exposure of the Milky Way a little bit to +.12 and I didn’t like it, so I moved it back down a little bit. Then I got it to where I was happy with it. Really it’s just +.01.
6:35 The next thing that I did after doing the brush strokes is I decided to increase the shadows. I really wanted these trees to be a nice, dark silhouette. So I increased the shadows to +.28 and I did that over here.
6:52 I also wanted to make it a little bit brighter. I felt that this was a little too dark. And so I did some black clipping. I did that by actually decreasing some of the black in the photograph, so I increased that by +.38. And this is my final copy.
7:11 So as you can see the before looks like this.
I hope you enjoy my video editing The Milky Way!!!
To purchase some of my photographs through the stock agency, visit Shutterstock today!
Read more of my travel stories here!
Please note, this website may contain ads and affiliate links. Thank you for your support and for making this site possible!
If you like my work, please send me a donation to encourage me to do more.
Thanks for your support!
[wpedon id=”1433″ align=”center”]


