In November 2013 I went up to Glacier Point in Yosemite National Park, CA for the very fist time. I LOVE Yosemite. It is honestly one of my favorite places on the earth, my happy place. I had never been to Glacier Point before. A dance company hired me to take some high resolution photographs for their performance. The theme was Dream and they wanted a shot of The Milky Way or night sky for their show. While I had been taking photos since I was a little girl, I had never attempted the night sky before. I’ve learned a lot since this first trip on how to capture and edit star photographs🙂
Camera Settings:Â ISO 6400, 24mm, f/2.8, 20 sec, White Balance 3,194 temp, +3 tint
My first attempt at photographing and editing the Milky Way
We lived in the valley and had way too much light noise to take decent shots of the Milky Way. Because of that, I decided to drive up to Glacier Point. My son and I left after dark. Glacier Point Road often closes in the winter due to poor road conditions. I was lucky and it reopened for just a few days in November. Patches of ice spotted the sides of the road, but overall it felt safe.
Getting up to Glacier Point takes an additional hour from the entrance to Yosemite, so plan accordingly. You can come in from the West or the South. From Wawona Road, turn onto Glacier Point road and drive until you hit a parking lot at the very end. Then walk up a steep path to get to the lookout. I have never seen SO MANY stars in my entire life!!! It was breathtakingly beautiful.

November is NOT the best time to go up to Glacier Point
Because it was November, we were the only ones up there and totally removed from all civilization. The roads had been iced over but cleared just enough that we could make the trip.
I, truthfully, was (and still am) terrified of bears. My son came with me and we walked to the edge of the lookout in the pitch black. Tiny lights from the Yosemite village dotted the distance. I had no idea how far up I was or even where I was. Being the ONLY ONES up there, I was terrified, but that’s part of the adventure, right?
My first attempt at taking a photograph of the Milky Way proved to be a challenge (see above photograph). The light noise to the right came all the way from Fresno, CA, several hours away. While I was super pleased and the dance company seemed happy, I’ve learned a lot since then. My editing skills were rusty and I think I added too much color to The Milky Way. It was not accepted at Shutterstock, and I was disappointed.
Camera Settings:Â ISO 6400, 24mm, f/2.8, 20 sec, White Balance 3,194 temp, +3 tint
Editing the Milky Way can be learned
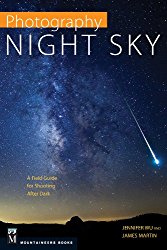
Since then I’ve learned a lot about the night sky. (Check out my video on how I edited these photos here!) I got a book by Jennifer Wu, Photography: Night Sky: A Field Guide for Shooting After Dark, and I LOVE it. It is invaluable if you want to venture out after dark.
Second time photographing the Milky Way
On another trip, I decided to visit Glacier Point during the day to see exactly where I had hiked and what to look out for. This totally helped alleviate my fears about the unknown. I went back again in August 2014 with my husband, Dave, and son, when The Milky Way was supposed to be at its peak. There were astronomy clubs up there and lots of photographers. When you are so removed from the busyness of the world, there is an unspoken sacredness and respect. You feel part of something amazing and new. There is nothing quite like it.

Camera Settings:Â ISO 6400, 24mm, f/2.8, 20 sec, White Balance 3,194 temp, +3 tint
Light painting is SO much fun for night photography
One photographer there taught me how to paint with my flashlight for the above photograph of my son. We call it our “Tron” shot, and surprisingly, I actually won a contest for this photograph.
Camera Settings:Â ISO 6400, 24mm, f/2.8, 20 sec, White Balance 3,194 temp, +3 tint
I had an LED flashlight with a slightly more bluish hue which I used to “paint” my rocks with light. Because the exposure was longer, I only needed to flash the rock for a second and then I turned off my flashlight.
Camera Settings:Â ISO 6400, 24mm, f/2.8, 20 sec, White Balance 3,194 temp, +3 tint
Night photography requires patience as planes often fly by
The streak behind the trees above is from an airplane. With the Fresno airport in the distance, there were often planes getting into my photographs, so I had to be patient and take several shots.
Camera Settings:Â ISO 6400, 24mm, f/2.8, 20 sec, White Balance 3,194 temp, +3 tint
I looked up and there was Half Dome right in Front of me
It was neat and a little bit eerie seeing the silhouette of Half Dome in the distance. Again, there were SO many stars!!! I could barely make out any constellations!

Camera Settings:Â ISO 6400, 24mm, f/2.8, 20 sec, White Balance 3,194 temp, +3 tint
This is the lookout from the top of Glacier Point at night. The lights below are from Yosemite Village.
Camera Settings:Â ISO 6400, 24mm, f/2.8, 20 sec, White Balance 3,194 temp, +3 tint
Creating star trails with your camera
I moved further down the path to be away from the crowds and found this little spot. I used an app I got for my phone to find the north star and pointed my camera towards it. Can you spot it above? If not, you will in the next photograph! I decided to set up for a long exposure for some star trails before heading the 3 hours towards home. (We got home LATE that night.)
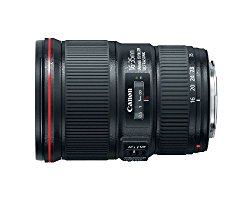
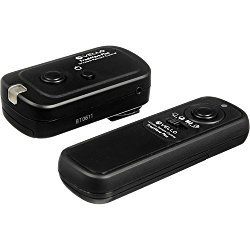
The above image took 19.7 minutes to take. I had my Canon 5D Mark ii Camera set up with ISO 6400, 24 mm, and f/8.0. The lens I used was my Canon 16-35mm wide angle lens. In order to get the long exposure, I had to use the bulb setting and a remote shutter release to take the shot.
When taking long exposures, be aware of other hikers and lights
The small amount of light on the rock is from some hikers who were heading home. Thankfully it didn’t ruin the shot. I actually like it:) When the hikers were coming down the path, I called out for them to turn off their light until they were past my camera. Thankfully they did. We got to chat a little bit about what I was doing which was fun. This photograph has some noise in the shot due to the long exposure. There is a feature on my camera to help reduce it for long exposure high ISO noise reduction, but I didn’t know about it until I got home. I had to spend hours in Adobe Lightroom trying to clean it up. Lesson learned. That said, it is still a beautiful shot and I am happy with it.
Camera Settings:Â ISO 6400, 24mm, f/2.8, 20 sec, White Balance 3,194 temp, +3 tint
Making a trip to Glacier Point, Yosemite National Park is worth it!
As you can see, if you are ever in California and want to see some AMAZING stars, I highly recommend making the trip up to Glacier Point. Come in the late summer, when there is a new moon for the best view of the Milky Way. Also watch the weather because cloud cover can ruin your night (I know from experience).
If you do decide to go, I recommend getting there when it’s light and then watching the sun set over Half Dome. That view in and of itself is worth the trip. Doing so will give you a chance to get your bearings and decide on where you want to set up your tri-pod. You won’t be disappointed!
Camera Settings:Â ISO 6400, 24mm, f/2.8, 20 sec, White Balance 3,194 temp, +3 tint
Happy travels!
Juventa Vezzani
Read more of my travel stories here!
To purchase some of my photographs through the stock agency, visit Shutterstock today!
Please note, this website may contain ads and affiliate links. Thank you for your support and for making this site possible!
If you like my work, please send me a donation to encourage me to do more.
Thanks for your support!
[wpedon id=”1433″ align=”center”]


