Rejected again? How many times have you been frustrated by those status updates from Shutterstock? I know that they used to plague me when I first started creating stock photography. What if there was something you could do? Trust me, there is! Shutterstock approval for stock photography doesn’t have to be rocket science.

Today I wanted to share how I increased my Shutterstock approval rate from an average acceptance of 50% to 100%. As you practice and learn to take better photos, you will see your stock photography acceptance rates jump as well. (Not a Shutterstock Contributor yet? No problem, click here to join!)

Going from a Shutterstock approval rate of 50%-100%
Changing my Shutterstock approval status took time and practice. Getting into Shutterstock proves difficult at first. It took me 6 months of trying before the Shutterstock agency finally accepted me. At the time, you had to get 7 out of 10 images accepted in order to be able to contribute. After 6 months of trying, I wanted to give up. My husband, Dave, and my sister, Bonnie, encouraged me to try one more time. I took the leap of faith, submitted some photos, and I finally got in!!! Barely. 7 out of 10 of my photographs got accepted (see the photo collage below for my very first stock photos).
Since then, I have been fine tuning my photography skills and have gained a greater understanding on what it takes to have stock photographs accepted. From what I’ve learned, the key to having zero rejections with Shutterstock is to use excellent equipment, thoughtful photographic techniques, and good editing skills. While I am focusing this article specifically on the Shutterstock Agency, I have seen success using these tips across all the stock photography agencies that I currently belong to.
Stock Photography Tip #1:Â Excellent equipment starts with a good camera
First, Shutterstock approval rates increased dramatically for me when I upgraded my camera equipment. My first DSLR Camera was a Canon Rebel XS. While a great starter camera, the Canon Rebel XS only had 10.1 megapixels and seemed entry level to me in terms of image quality. I used the 70-300 mm Canon stock lens that came with it. While I DID get some images accepted, many were rejected. Time and time again.

I remember taking the above photograph at Gatorland in Florida and wanted to sell it at Shutterstock. Never mind the fact that some parks and locations are restricted in terms of what you can sell for Stock Photography (I never thought to check their policy – it’s a good idea to do so). I used these camera settings for the above photograph: ISO 800, 300mm, f/7.1 at 1/400 sec. Looking back, I can see why Shutterstock rejected it. But, at the time, I felt really disappointed. This was art, wasn’t it? How could they not see it?

Looking closer, perhaps one can understand why they rejected it. The photograph is a little bit grainy, out of focus, and at that zoom distance of 300 mm, I really needed to use a tri-pod to take the shot.
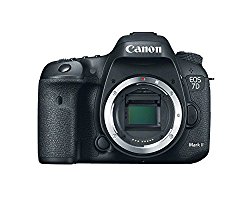
While a good camera is essential, I have been playing around with my cell phone camera for stock photography. While some of my cell phone photos have been accepted, I myself am not as happy with the image quality and will likely stick with my Canon 5D Mark ii until I can upgrade. Bottom line, get the highest quality camera you can afford.

Stock Photography Tip #2:Â Quality lenses make a huge difference in getting stock photos accepted
Shutterstock also rejected this photograph I took of a blackbird. Honestly, at the time, I felt devastated. The song, “You’re Playing with the Big Boys Now” from the movie “The Prince of Egypt” kept playing through my mind. I felt as if I would never amount to anything as a stock photographer and wanted to quit.

Once again, time has a way of healing wounds and we can learn from our mistakes. While there may be several flaws, the biggest one I see here is chromatic aberration and purple fringe. Do you see the purple around the beak? This was the main reason Shutterstock rejected the photo.
Apparently purple fringe and chromatic aberration is common with the Canon 70-300mm lens. While it still takes nice photographs, as a lower quality lens it has its flaws. I ended upgrading my equipment to a Canon 5D Mark ii and then upgraded my lenses as well. I have my eyes on even better equipment now, but this gave me the quality level I needed for greater acceptance rates and has been a great camera.
With a good lens, it IS possible to get tack sharp images without the purple fringe or chromatic aberration.

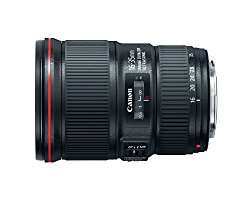
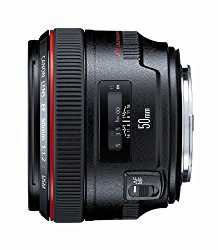
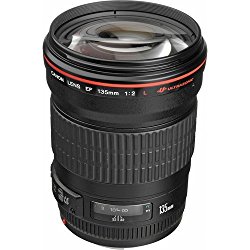
The Canon “L” series lenses have been spectacular! I currently own the Canon EF 50mm f/1.2 L Lens, Canon EF 16-35mm f/4L Lens, Canon 135mm f/2 L Lens, and the Canon EF 100mm f/2.8 L Lens. Good glass really makes all the difference when taking good photographs.
Stock Photography Tip #3:Â Get a good tripod and remote
Another important part of stock photography, especially when taking landscape photographs, is having a good tripod. After taking a photography class by Doug Steakley, I upgraded my tripod head to a ballhead from Really Right Stuff. I haven’t upgraded my base to a carbon one yet, but I plan to someday. I’m still using my Manfrotto tripod base and it does the job quite well.  Even if you have an inexpensive tripod, it helps tremendously with image stabilization.
Tripods are also essential in getting soft water photographs, as are good filters. I used the Singh Ray Variable Neutral Density Filter and Polarizer for these water shots.
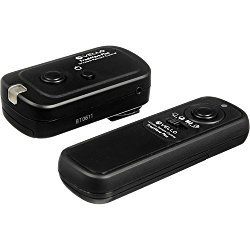
Another tool in my bag that has helped with my Shutterstock acceptance rate is the Vello Wireless Remote. While more expensive remotes exist, this little tool does an amazing job in preventing camera shake. I use it all the time and had great success with it for my long exposure star photographs and photos of the Milky Way.
Stock Photography Tip #4:Â Good lighting is essential
I cannot talk enough about good lighting. More often than not, poor lighting was the BIGGEST reason given for my photography getting rejected. Good lighting is KEY if you want to have your photos approved.
Currently my largest sellers in stock photography at Shutterstock are my food photographs. The Shutterstock approval rate for food photography skyrocketed after I installed a studio in my garage. Studio controlled lighting transformed my acceptance rate and gave me confidence to continue contributing to Shutterstock. If you like to take still shots, then I highly recommend investing in quality studio lighting.
Time of day also makes a difference in good lighting. Morning light and evening light create soft, magical glows on the landscape. Even with that, mist and other environmental conditions can have an impact. Time, patience, and practice will help you improve your lighting. Be bold and play around. Also, avoid harsh shadows as best you can.
Stock Photography Tip #5:Â Remember the basics of good photography if you want Shutterstock approval
With every stock photograph, remember the basics of good photography. I’ve learned a lot along the way and continue to improve every day. Key elements of good photography include the “Rule of Thirds,” Leading Lines, Different Angles and Perspectives, Proper Exposure Techniques, as well as Interesting Subjects. Online tutorials, good books, and classes can help teach this.
Stock Photography Tip #6:Â Good editing makes all the difference
I had an interesting experience this past week. As I wrote my blog post about our trip to the Grand Canyon National Park, I had an opportunity to re-visit some photographs that had all been rejected at Shutterstock. I’ve learned a lot since that trip. Look at how I originally edited my photograph!

Shutterstock rejected the above photograph of the Grand Canyon. In fact, they rejected EVERY SINGLE ONE of my Grand Canyon Photographs. Talk about a low blow to my self-esteem. I thought that the photos needed to be trashed. Come to find out, the bones were good, they just needed better editing.

Look at this – the SAME EXACT PHOTOGRAPH, only edited better. I made a video tutorial detailing exactly what I did to edit my Grand Canyon Photographs in Adobe Lightroom Classic CC that you can watch here. I re-edited my favorite Grand Canyon pictures, submitted them as a test, and had a 100% Shutterstock approval. The Luminance adjustments, gradient filter, and clarity brush tool make a huge difference in sharpening and evening out landscape photos. Understanding white balance and saturation levels also helps. Never underestimate good editing.
I did it! So can you! Why not give it a try?
In conclusion, you CAN increase your Shutterstock approval rate from 50%-100%. While I still have a lot to learn about making a steady income with my stock photos, getting them accepted to the stock agency definitely helps!
I hope that you have enjoyed reading about how I increased my Shutterstock approval rate and encourage you to try your hand at stock photography today!
In the mean time, Happy Travels!
Juventa Vezzani
Read more of my travel stories here!
Do you love photography? Click here for a tutorial on how I edited my Grand Canyon Photos in Adobe Lightroom.
To purchase some of my photographs through the stock agency, visit Shutterstock today!
Please note, this website may contain ads and affiliate links. Thank you for your support and for making this site possible!Â
If you like my work, please send me a donation to encourage me to do more.
Thanks for your support!
[wpedon id=”1433″ align=”center”]




I have watched you struggle at the beginning with acceptance into stock photo companies. You have come so far. I love your encouragement, that anyone can achieve this through some patience, perseverance and a little humble pie.
If you love taking photos and want to get accepted and tap into a wonderful opportunity, take these points to heart. Believe you will be accepted and apply these points. You can do it!
Thank you so much:)